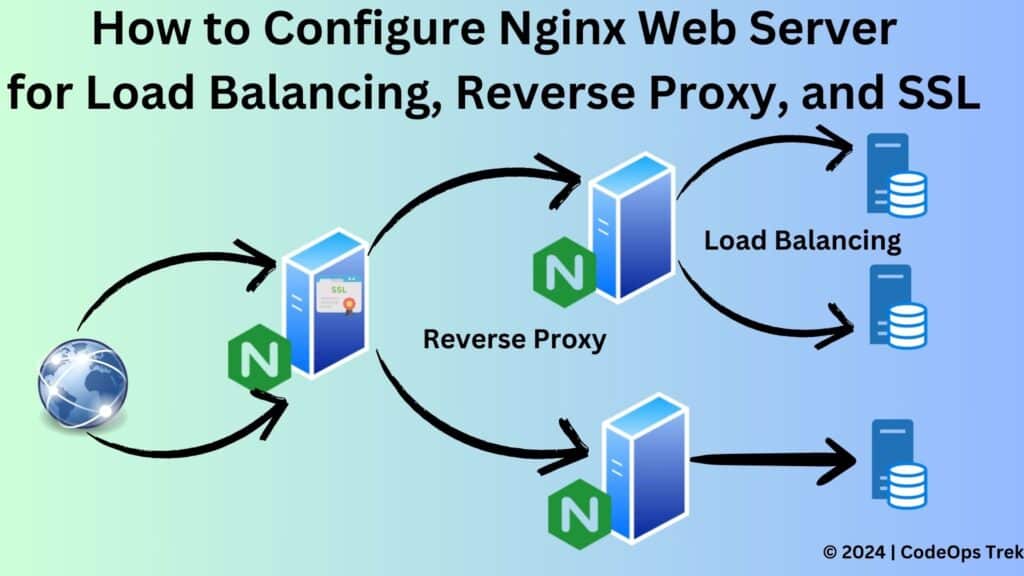
Nginx is a versatile web server that is widely used for its high performance, stability, and rich feature set. One of its most powerful features is the ability to act as a load balancer and reverse proxy, making it a vital component in scaling web applications. Additionally, securing web traffic with SSL (Secure Sockets Layer) is essential in modern web applications. In this guide, we will walk through configuring Nginx for load balancing, reverse proxy, and SSL.
Nginx is a versatile web server known for its high performance, stability, and rich feature set. With its capabilities as a load balancer and reverse proxy, it plays a crucial role in scaling web applications. Moreover, it is essential to secure web traffic using SSL. In this guide, we will demonstrate how to configure Nginx for load balancing, reverse proxy, and SSL.
Table of Contents
Nginx (pronounced “engine-x”) is an open-source web server that can also be used as a reverse proxy, load balancer, mail proxy, and HTTP cache. It is known for its high performance, stability, rich feature set, simple configuration, and low resource consumption.
Nginx secures data transmitted over the internet by encrypting it, protecting sensitive information from prying eyes and tampering.
To understand working of SSL/TLS in depth, including how to generate SSL certificates, you can refer to my blog post Understanding HTTPS, SSL/TLS & Certificate Generation | Learn How SSL Works.
Nginx distributes incoming network traffic across multiple servers to ensure no single server becomes overwhelmed, enhancing the availability and reliability of web applications.
Nginx acts as an intermediary for requests from clients seeking resources from servers, improving security, performance, and reliability.
To generate a self-signed SSL certificate, you can use OpenSSL. This method is particularly useful for testing purposes or internal applications where a trusted Certificate Authority (CA) is not required.
Generate CSR : Create a folder and run below command into its terminal
openssl req -new -newkey rsa:2048 -nodes -keyout yourdomain.key -out yourdomain.csrEnter below details :
Country Name (2 letter code) [AU]: IN
State or Province Name (full name) [Some-State]: MH
Locality Name (eg, city) []: Mumbai
Organization Name (eg, company) [Internet Widgits Pty Ltd]: CodeOps Trek
Organizational Unit Name (eg, section) []:
Common Name (e.g. server FQDN or YOUR name) []: www.codeopstrek.com
Email Address []: contact@codeopstrek.com
Generate Self-Signed Certificate
Two files will be generate in folder youromain.csr & yourdomain.key. Execute below command.
openssl x509 -req -days 365 -in yourdomain.csr -signkey yourdomain.key -out yourdomain.crtA certificate will generated in folder as yourdomain . As it is self signed and not by a trusted CA , a cross mark will be seen but this certificate works as a normal certificate and it will provide encrypt data and secure transmission.
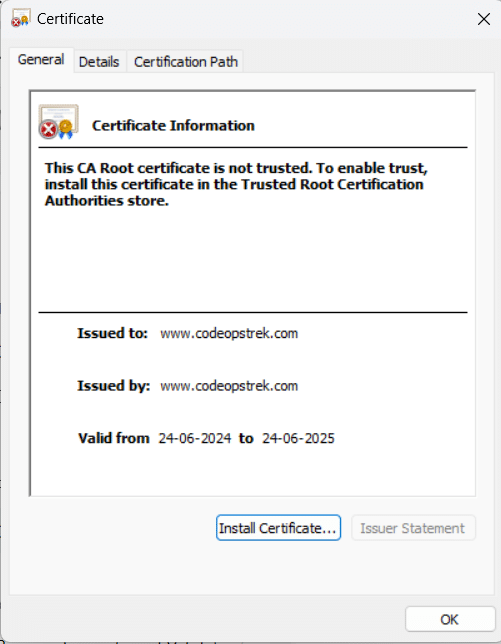
- Create a folder : Custom Nginx
- Create Nginx Configuration File: Create a file named
nginx.confwith your custom Nginx configuration, including SSL settings. - Create Dockerfile: Write a Dockerfile to build your custom Nginx image.
- Save Folder Containing SSL and Key: Save your SSL certificate and key in a folder.
custom-nginx

├── Certificate

│           ├── codeopstrek.key

│           ├── codeopstrek.csr

│           ├── codeopstrek.crt

├── nginx.conf

└── Dockerfile
nginx.conf
server {
    listen 8080;
    listen 443 ssl;
    server_name www.codeopstrek.com;

    ssl_certificate /etc/nginx/ssl/nginx.crt;
    ssl_certificate_key /etc/nginx/ssl/nginx.key;

    ssl_protocols TLSv1.2 TLSv1.3;
    ssl_ciphers HIGH:!aNULL:!MD5;

    location / {
        root /usr/share/nginx/html;  # Serve the default Nginx welcome page
        index index.html index.htm;
    }
}# Use the official Nginx image as the base image
FROM nginx:latest
# Maintainer information (replace with your own)
LABEL maintainer="CodeOps Trek"
# Copy SSL certificate and key to the container
COPY ./Certificate/codeopstrek.crt /etc/nginx/ssl/nginx.crt
COPY ./Certificate/codeopstrek.key /etc/nginx/ssl/nginx.key
# Remove default Nginx configuration file
RUN rm /etc/nginx/conf.d/default.conf
# Copy custom Nginx configuration file
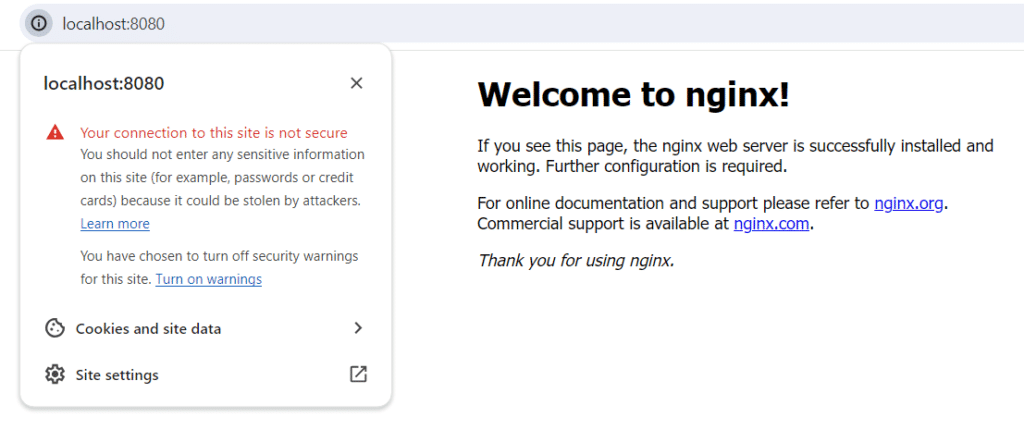
COPY nginx.conf /etc/nginx/conf.d/docker build -t custom-nginx .docker run --name CustomNginx -it -p 8080:8080 -p 443:443 custom-nginxAbove command will run custom nginx on 2 port i.e; 8080 & 443 . On 8080 http(Non SSL) works while on 443 https(SSL/TLS) work
Click : http://localhost:8080
Click : https://localhost:443
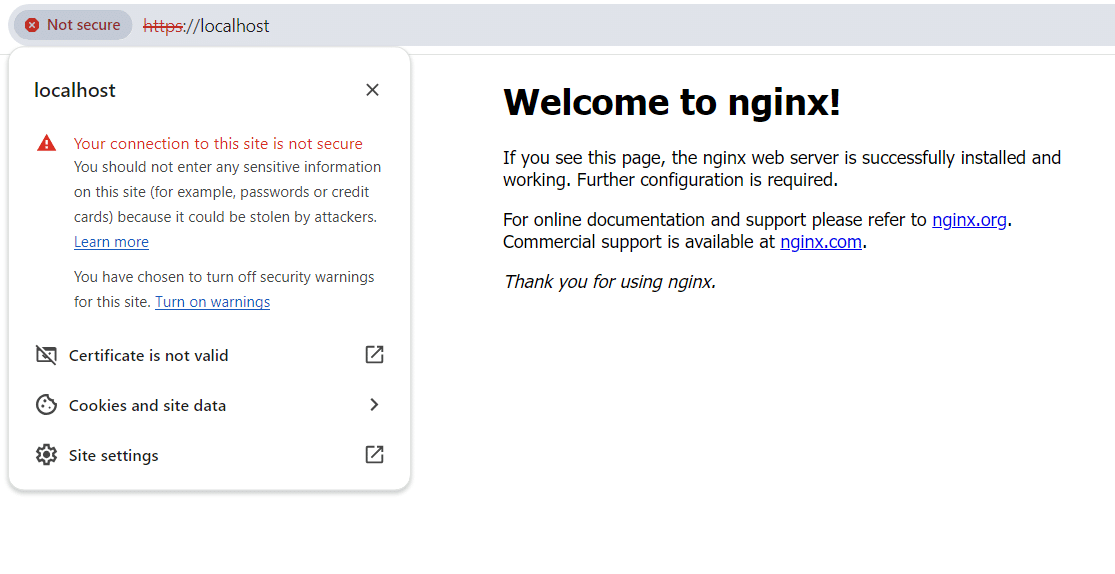
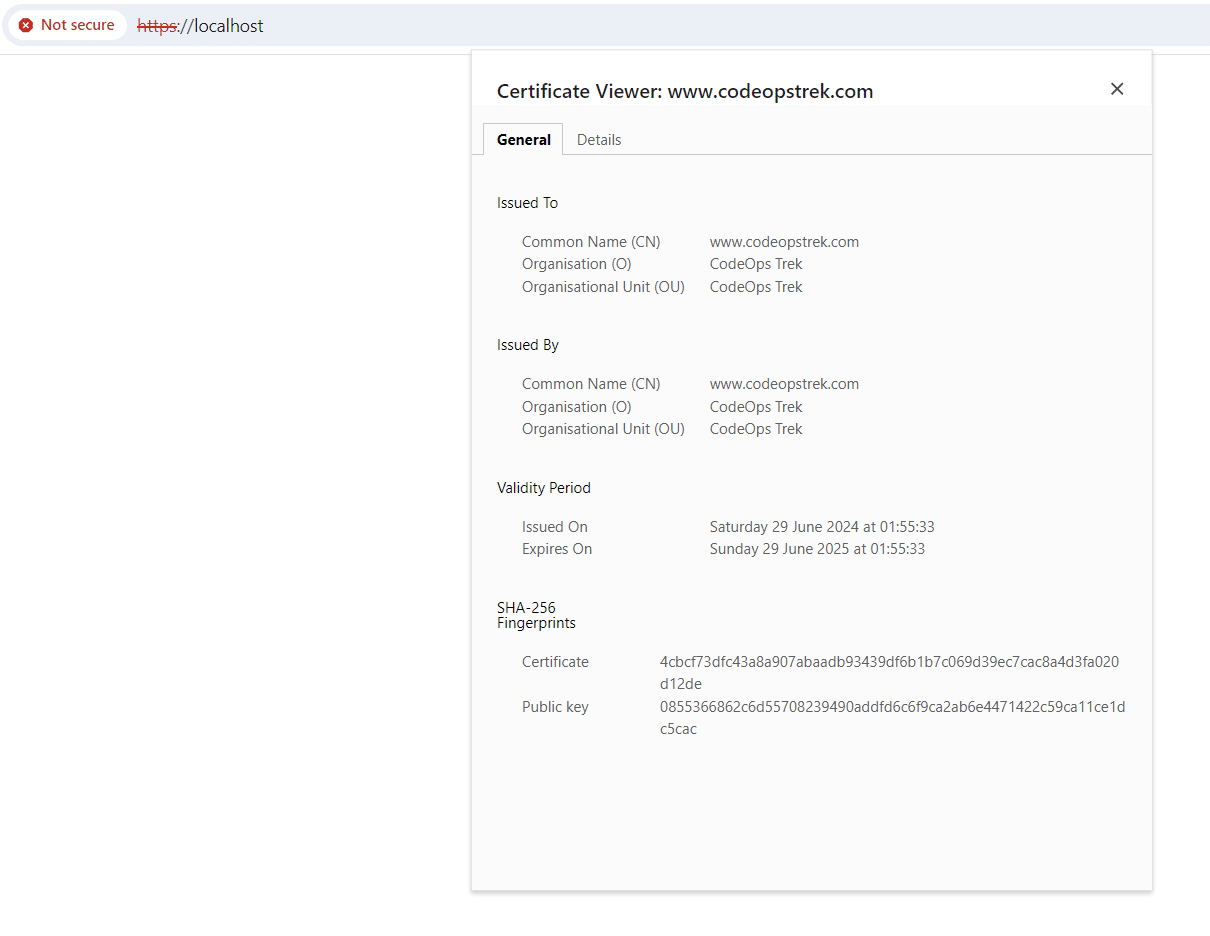
Voila! You’ve successfully integrated SSL into your Nginx setup. Great job!
We have two applications running in Docker containers:
1- Application 1: Running on port 8082, responds with “Hello from first application” at the endpoint /hi.
2- Application 2: Running on port 8084, responds with “Hello from second application” at the endpoint /hi.
We’ll configure Nginx to act as a reverse proxy, routing requests to these applications based on the URL path. For example:
- Requests to
http://localhost:8080/app1/hiwill be routed to Application 1. - Requests to
http://localhost:8080/app2/hiwill be routed to Application 2.
First, we’ll create a Docker network to allow our containers to communicate with each other:
docker network create app_networkNext, we’ll run an Nginx container on the Docker network:
1- Create the Nginx configuration file:Create a file named nginx.conf with the following content:
upstream application1 {
    server FirstApplicationContainer:8082;
}
upstream application2 {
    server SecondApplicationContainer:8084;
}

server {
    listen 8080;
    listen 443 ssl;
    server_name www.codeopstrek.com;

    ssl_certificate /etc/nginx/ssl/nginx.crt;
    ssl_certificate_key /etc/nginx/ssl/nginx.key;

    ssl_protocols TLSv1.2 TLSv1.3;
    ssl_ciphers HIGH:!aNULL:!MD5;

    location /app1 {
        proxy_pass http://application1;
        proxy_set_header Host $host;
        proxy_set_header X-Real-IP $remote_addr;
        proxy_set_header X-Forwarded-For $proxy_add_x_forwarded_for;
        proxy_set_header X-Forwarded-Proto $scheme;
    }

    location /app2 {
        proxy_pass http://application2;
        proxy_set_header Host $host;
        proxy_set_header X-Real-IP $remote_addr;
        proxy_set_header X-Forwarded-For $proxy_add_x_forwarded_for;
        proxy_set_header X-Forwarded-Proto $scheme;
    }
}
2- Run the Nginx container:
docker run --name CustomNginx --network app_network -it -p 8080:8080 -p 443:443 custom-nginx3- Run Application 1 Container:docker run --name FirstApplicationContainer --network app_network -it application1_image4- Run Application 2 Container:
docker run --name SecondApplicationContainer --network app_network -it application2_imageBy running both applications on the same Docker network, they can communicate with each other using their container names as hostnames. Port mapping is not required for either application because they communicate directly within the Docker network, conserving system ports. Port mapping is only necessary for the Nginx container, as it will handle external traffic and route it to the appropriate applications.
1- Application 1: Open your browser or use
curl to access http://localhost:8080/app1/hi. You should see the response “Hello from first application”.2- Application 2: Open your browser or use
curl to access http://localhost:8080/app2/hi. You should see the response “Hello from second application”.
We have two applications running in Docker containers:
1. Application 1: Running on port 8082, responds with “Hello from first application” at the endpoint /hi.
2. Application 2: Running two instances:
- Instance 1: Running on port 8084
- Instance 2: Running on port 8086
Both instances respond with “Hello from second application – instance {i}” at the endpoint /hi.
docker network create app_networkNext, we’ll run an Nginx container on the Docker network:
1- Create the Nginx configuration file:Create a file named nginx.conf with the following content:
upstream application1 {
    server FirstApplicationContainer:8082;
}
upstream application2 {
    server SecondApplicationContainer1:8084;
    server SecondApplicationContainer1:8086;
}

server {
    listen 8080;
    listen 443 ssl;
    server_name www.codeopstrek.com;

    ssl_certificate /etc/nginx/ssl/nginx.crt;
    ssl_certificate_key /etc/nginx/ssl/nginx.key;

    ssl_protocols TLSv1.2 TLSv1.3;
    ssl_ciphers HIGH:!aNULL:!MD5;

    location /app1 {
        proxy_pass http://application1;
        proxy_set_header Host $host;
        proxy_set_header X-Real-IP $remote_addr;
        proxy_set_header X-Forwarded-For $proxy_add_x_forwarded_for;
        proxy_set_header X-Forwarded-Proto $scheme;
    }

    location /app2 {
        proxy_pass http://application2;
        proxy_set_header Host $host;
        proxy_set_header X-Real-IP $remote_addr;
        proxy_set_header X-Forwarded-For $proxy_add_x_forwarded_for;
        proxy_set_header X-Forwarded-Proto $scheme;
    }
}
2- Run the Nginx container:
docker run --name CustomNginx --network app_network -it -p 8080:8080 -p 443:443 custom-nginx3- Run Application 1 Container:
docker run --name FirstApplicationContainer --network app_network -it application1_image4- Run Application 2 Container:
docker run --name SecondApplicationContainer1 --network app_network -it application2_image
docker run --name SecondApplicationContainer2 --network app_network -it application2_imageYou can test the load balancing by sending multiple requests to http://localhost:8080/app2/hi. You should see responses from both instances of Application 2.


The source code and Docker Compose file for this setup are available on GitHub: Source Code on GitHub
2- Open terminal of folder where yml file is there and run
docker-compose up -dversion: '3'
services:
nginx:
image: codeopstrek/custom-nginx
container_name: CustomNginx
ports:
- "8080:8080"
- "443:443"
networks:
- app_network
app1:
image: codeopstrek/app1
container_name: FirstApplicationContainer
networks:
- app_network
app2-instance1:
image: codeopstrek/app2-instance1
container_name: SecondApplicationContainer1
networks:
- app_network
app2-instance2:
image: codeopstrek/app2-instance2
container_name: SecondApplicationContainer2
networks:
- app_network
networks:
app_network:
driver: bridge
Configuring Nginx for load balancing, reverse proxy, and SSL is a powerful way to enhance the performance, security, and scalability of your web applications. By following the steps outlined in this guide, you can ensure that your web server is optimized for high availability and secure communication.
For further reading and resources, consider exploring the following:
Official Nginx Documentation: Comprehensive guides on configuring Nginx as a reverse proxy, load balancer, and for SSL termination are available in the Nginx documentation. Check out the sections on Nginx Reverse Proxy, Nginx Load Balancing, and Nginx SSL/TLS Termination.
Let’s Encrypt: A free, automated, and open Certificate Authority that provides SSL certificates to secure your web applications. Visit the Let’s Encrypt Documentation to learn more about obtaining and renewing SSL certificates.
By exploring these resources, you can deepen your understanding and enhance your skills in configuring Nginx for reverse proxy, load balancing, and securing your applications with SSL certificates.
A reverse proxy is used to distribute client requests to multiple backend servers, enhancing load balancing, security, and scalability.
You should use a reverse proxy when you need to distribute client requests across multiple servers, enhance security by hiding backend servers, manage SSL/TLS termination, and improve load balancing and scalability of your web applications
A reverse proxy forwards client requests to backend servers, while a gateway handles protocol translations and routes requests between different networks.
Yes, a load balancer can act as a reverse proxy by distributing client requests across multiple servers to improve performance and reliability.
A reverse proxy forwards client requests to backend servers, providing security and caching. A load balancer distributes client requests across multiple servers to optimize resource use, improve response times, and ensure high availability.
